Re-enable an Azure Resource
Restore access to your Napster API resource after its Azure SaaS subscription expired or was canceled
A Napster API subscription created through the Azure Portal is a 1-month SaaS subscription with auto-renew off by default. If auto-renew was never turned on, the subscription expires on its renewal date and Azure cancels it — and with it, your access to the Napster API. See Keep your subscription active for turning auto-renew on before this happens.
A canceled subscription can't be reactivated. The fix is to create a new SaaS subscription and link it to your existing Napster API resource — your resource, and everything in it, is still there. This guide walks you through it.
Create a new SaaS subscription
Open the Napster API subscribe page directly:
https://portal.azure.com/#create/touchcastinc1655995956899.napster_companion_api
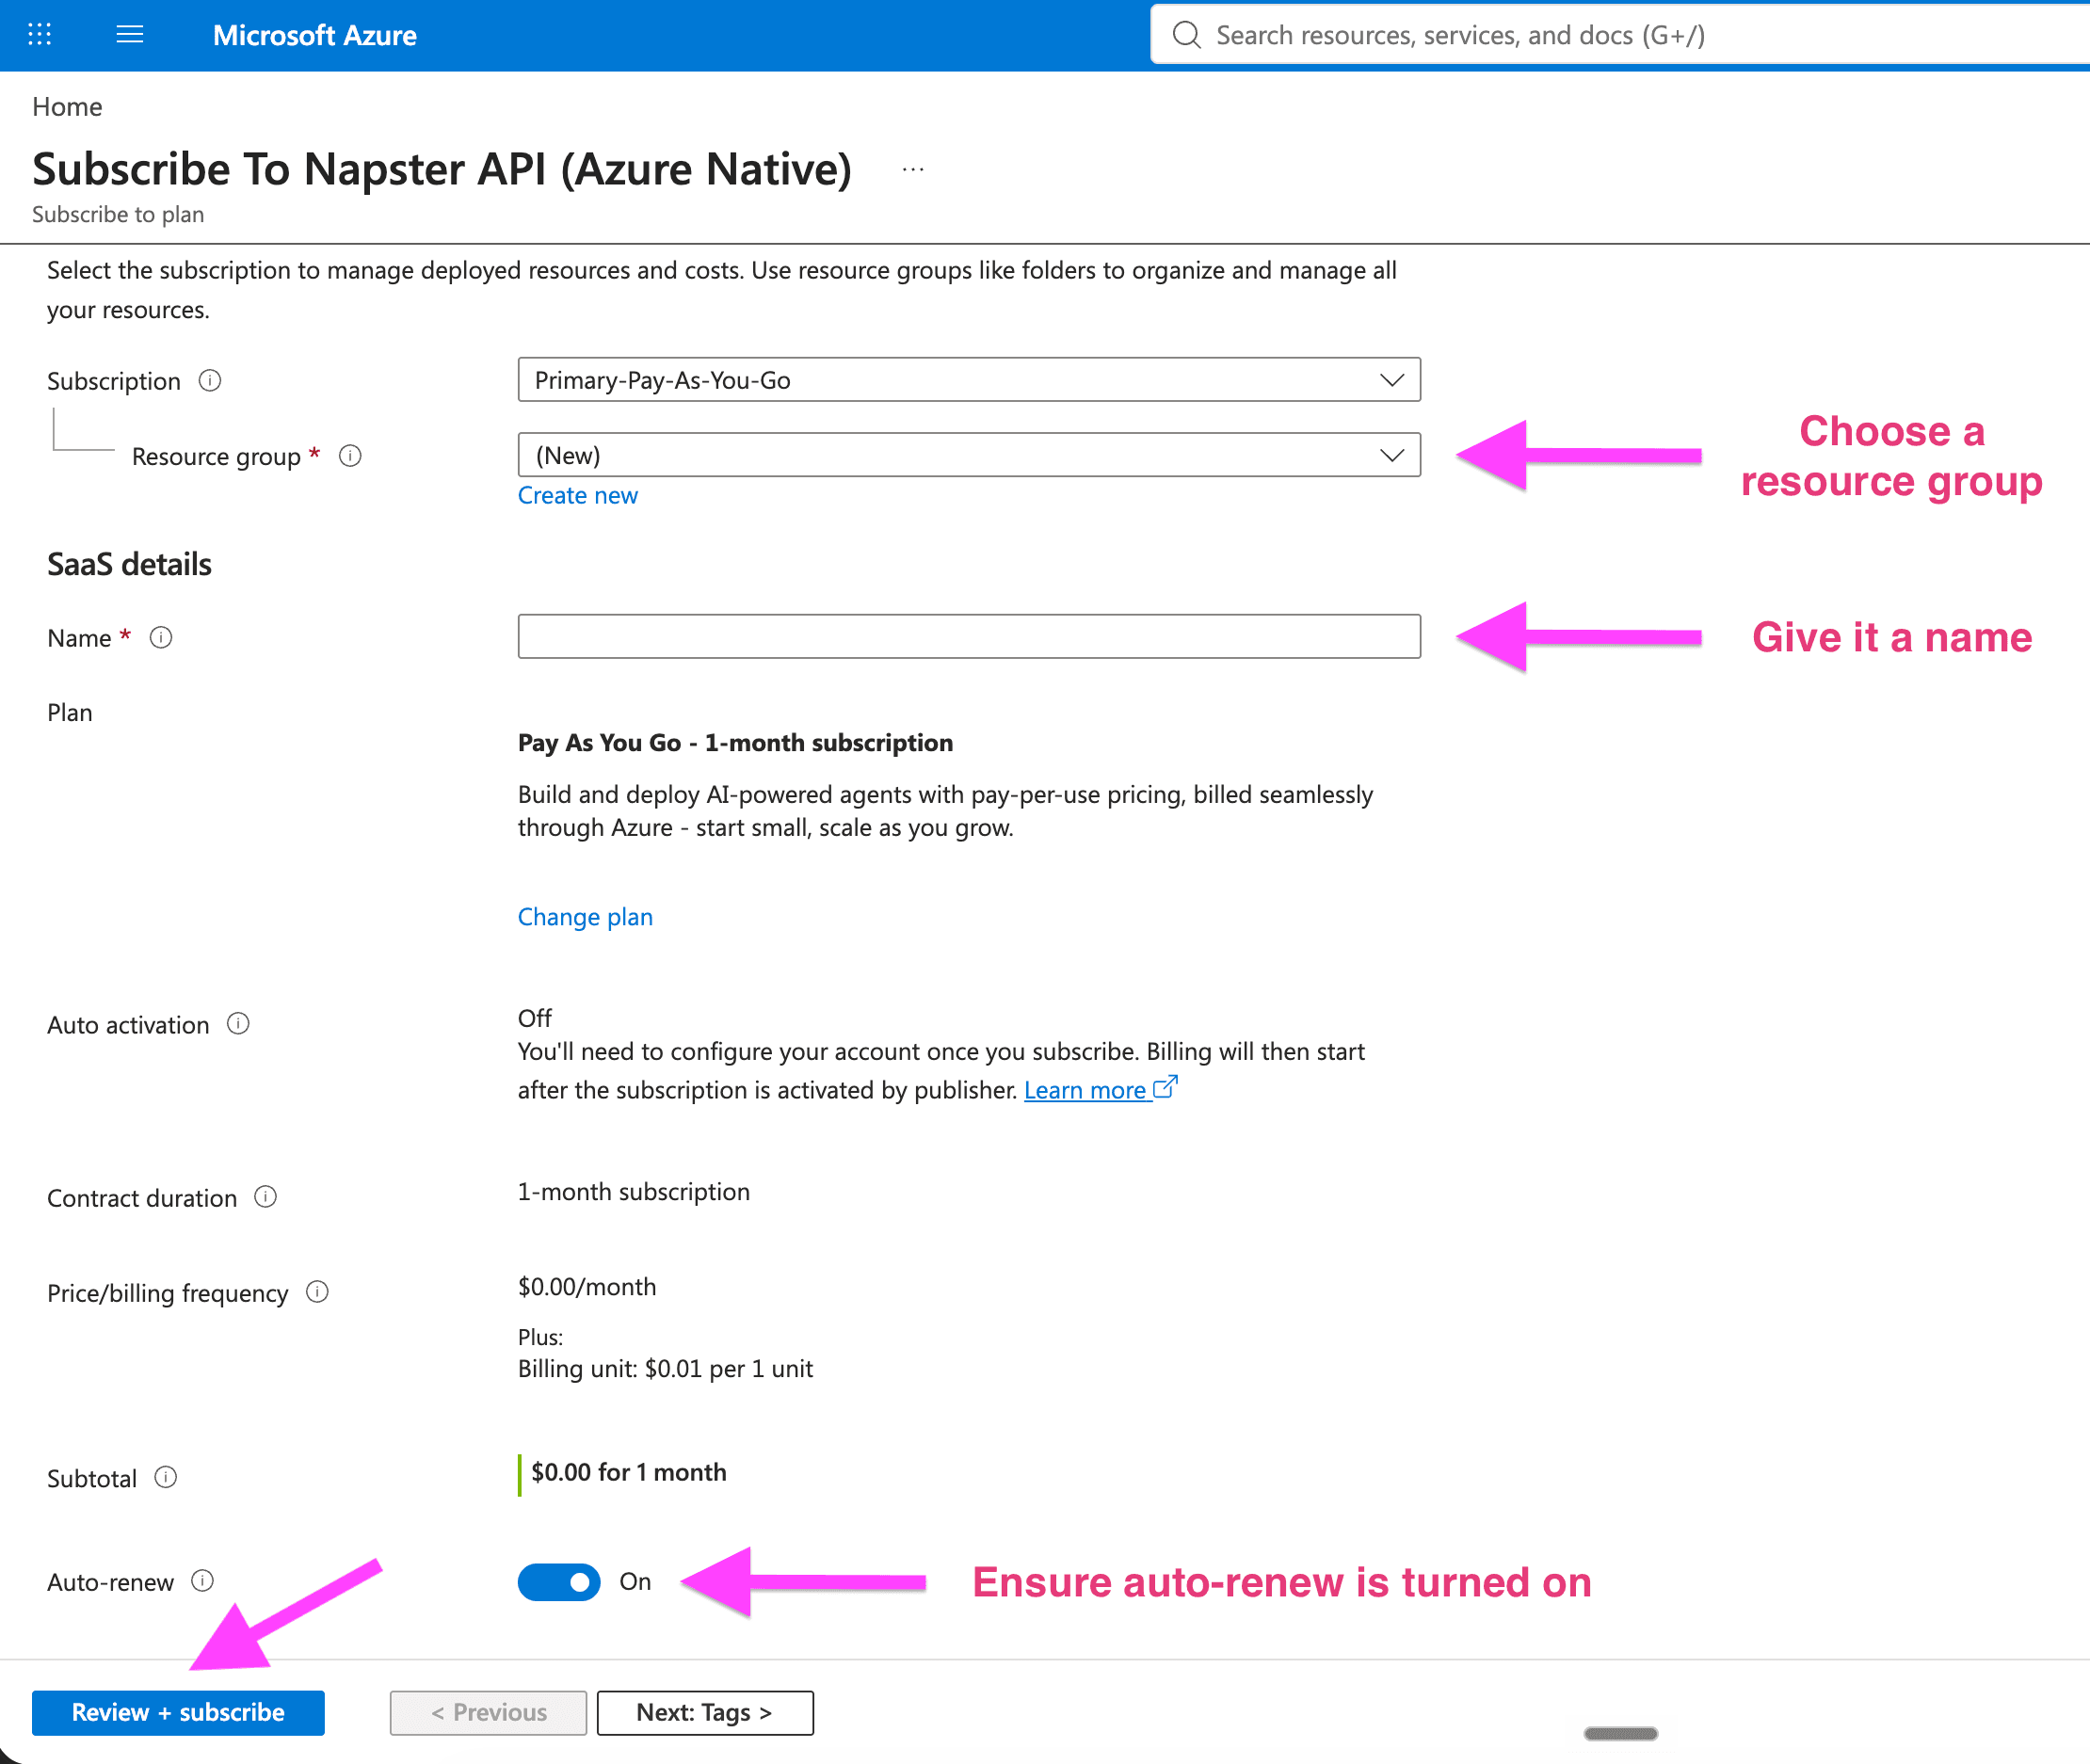
Sign in with the same Azure account that owns your existing Napster API resource, then fill in the details:
- Subscription — select your Azure subscription
- Resource group — choose a resource group
- Name — give the new SaaS subscription a name
- Auto-renew — switch it On, so this subscription doesn't expire the way the last one did
When everything is filled in, click Review + subscribe.
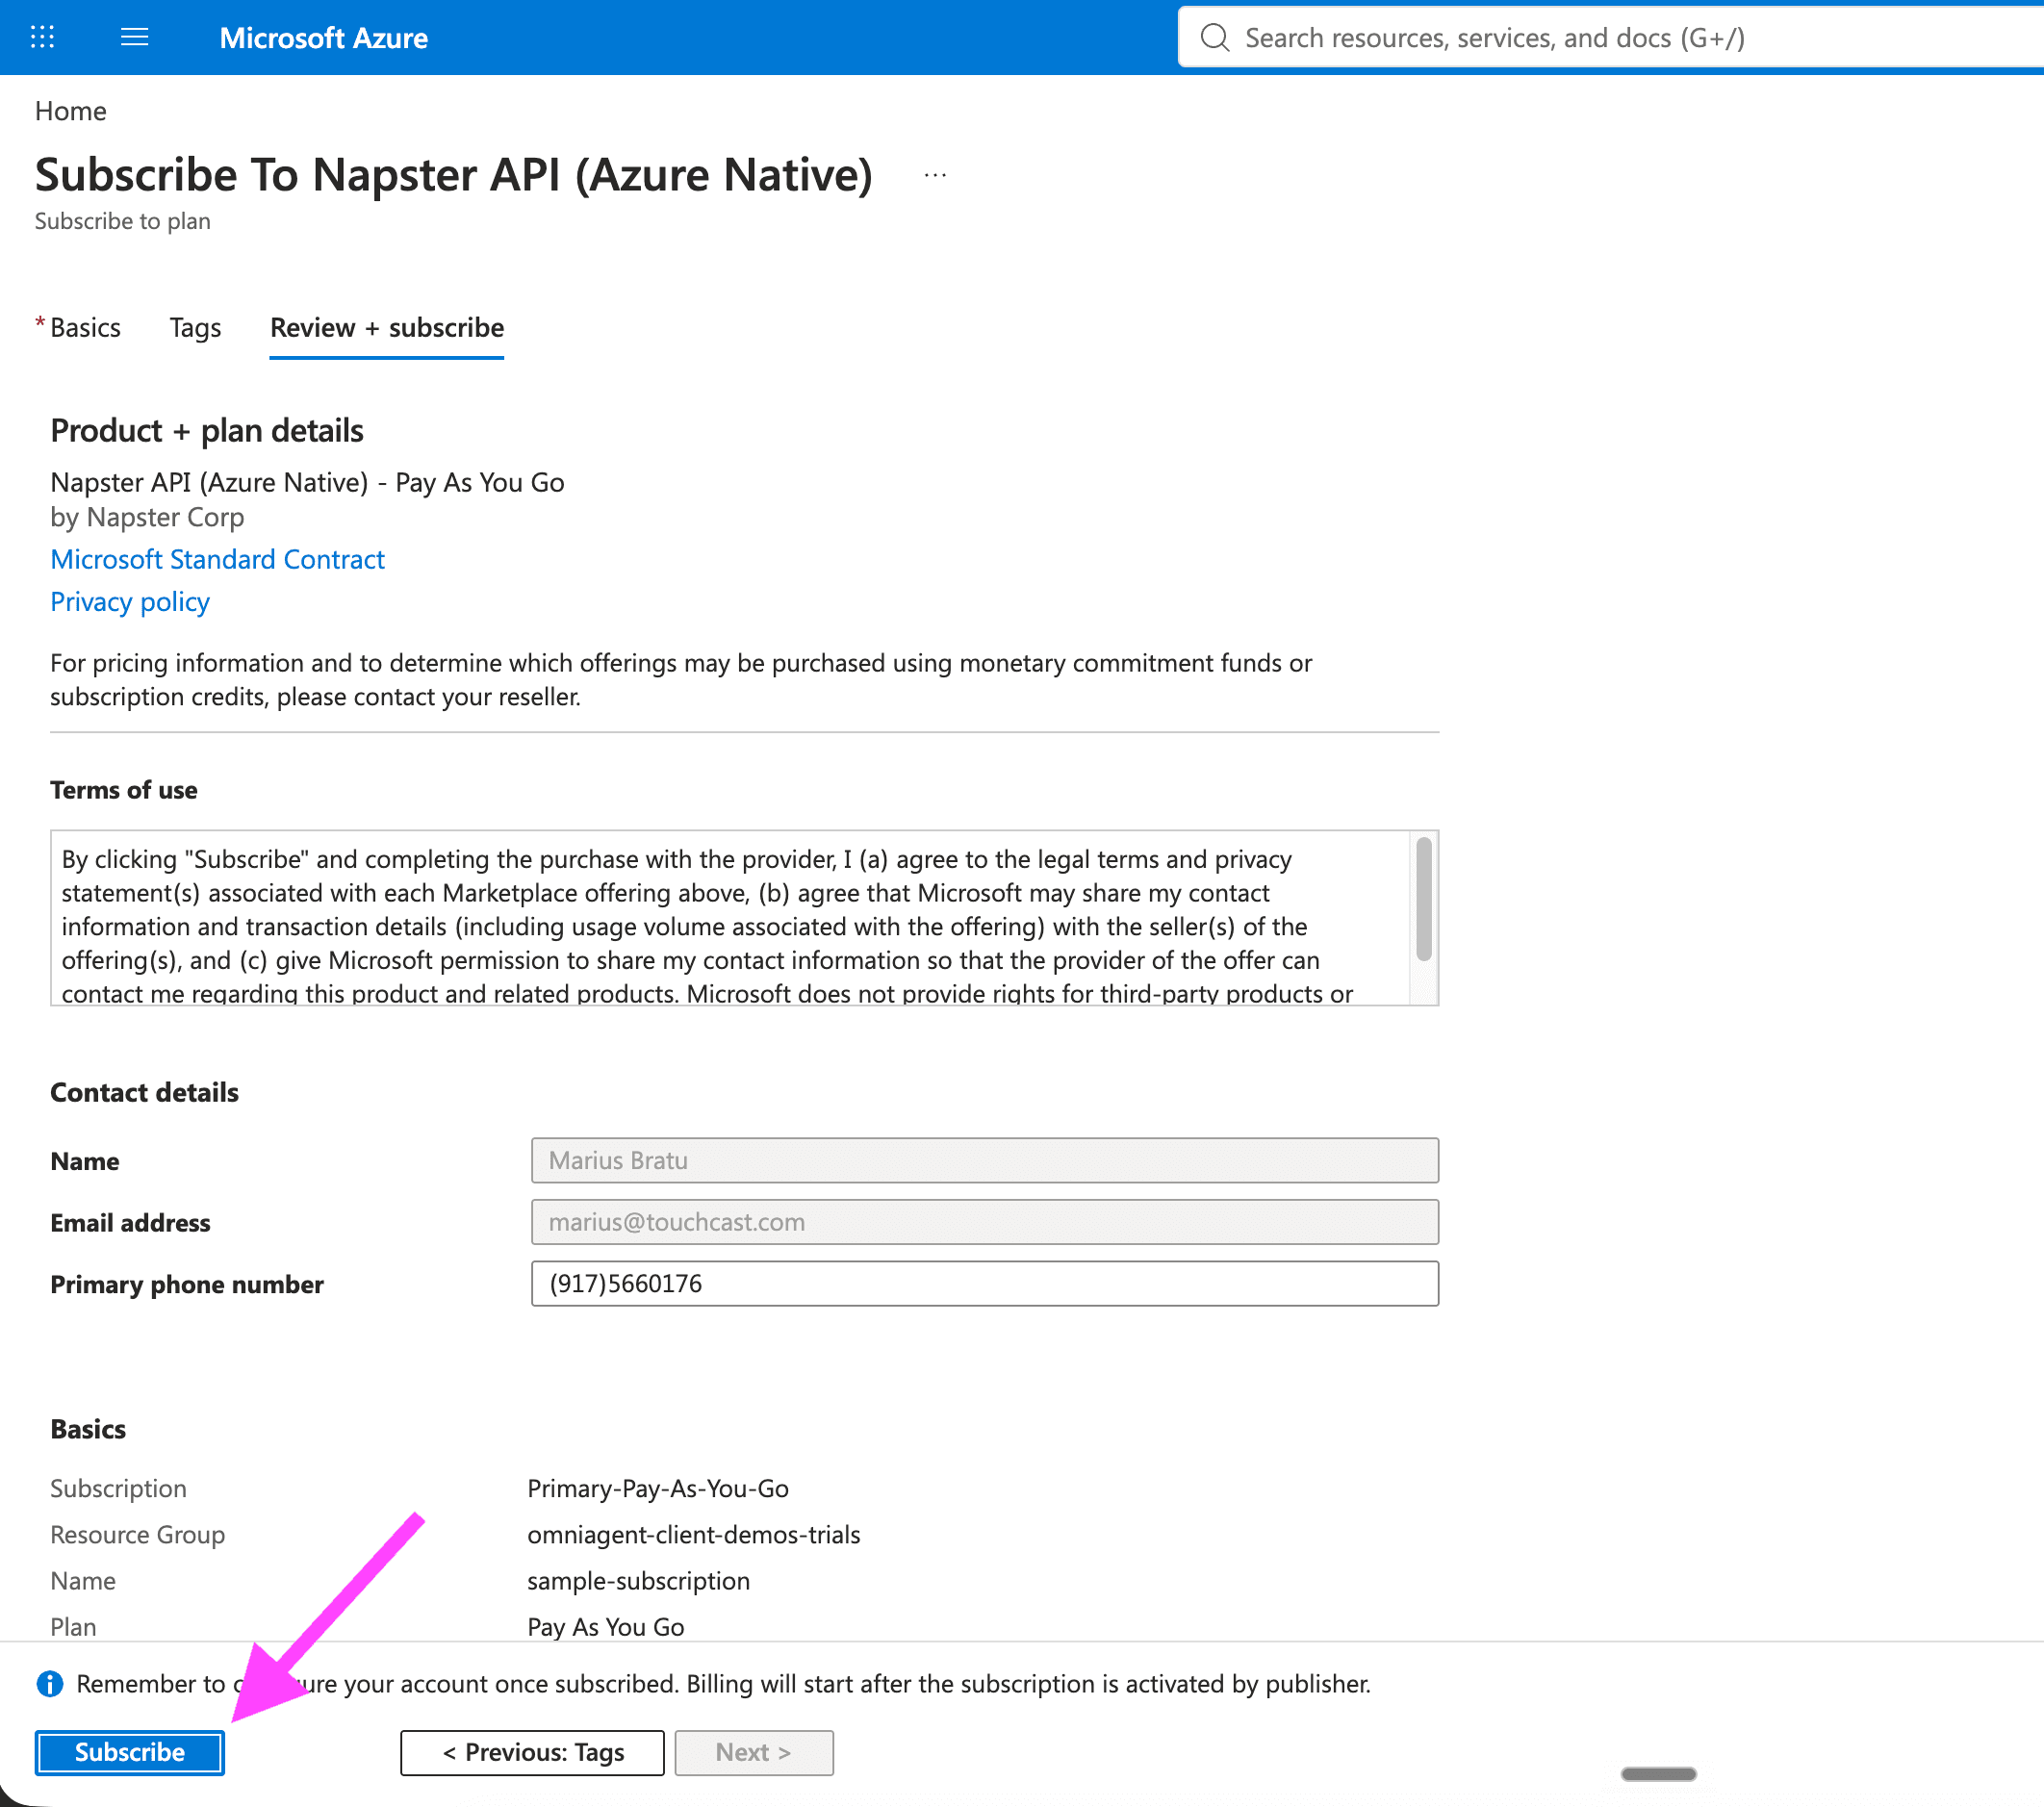
Review and subscribe
Review the plan, terms, and contact details, then click Subscribe. Azure creates the new SaaS subscription — this may take a few moments.
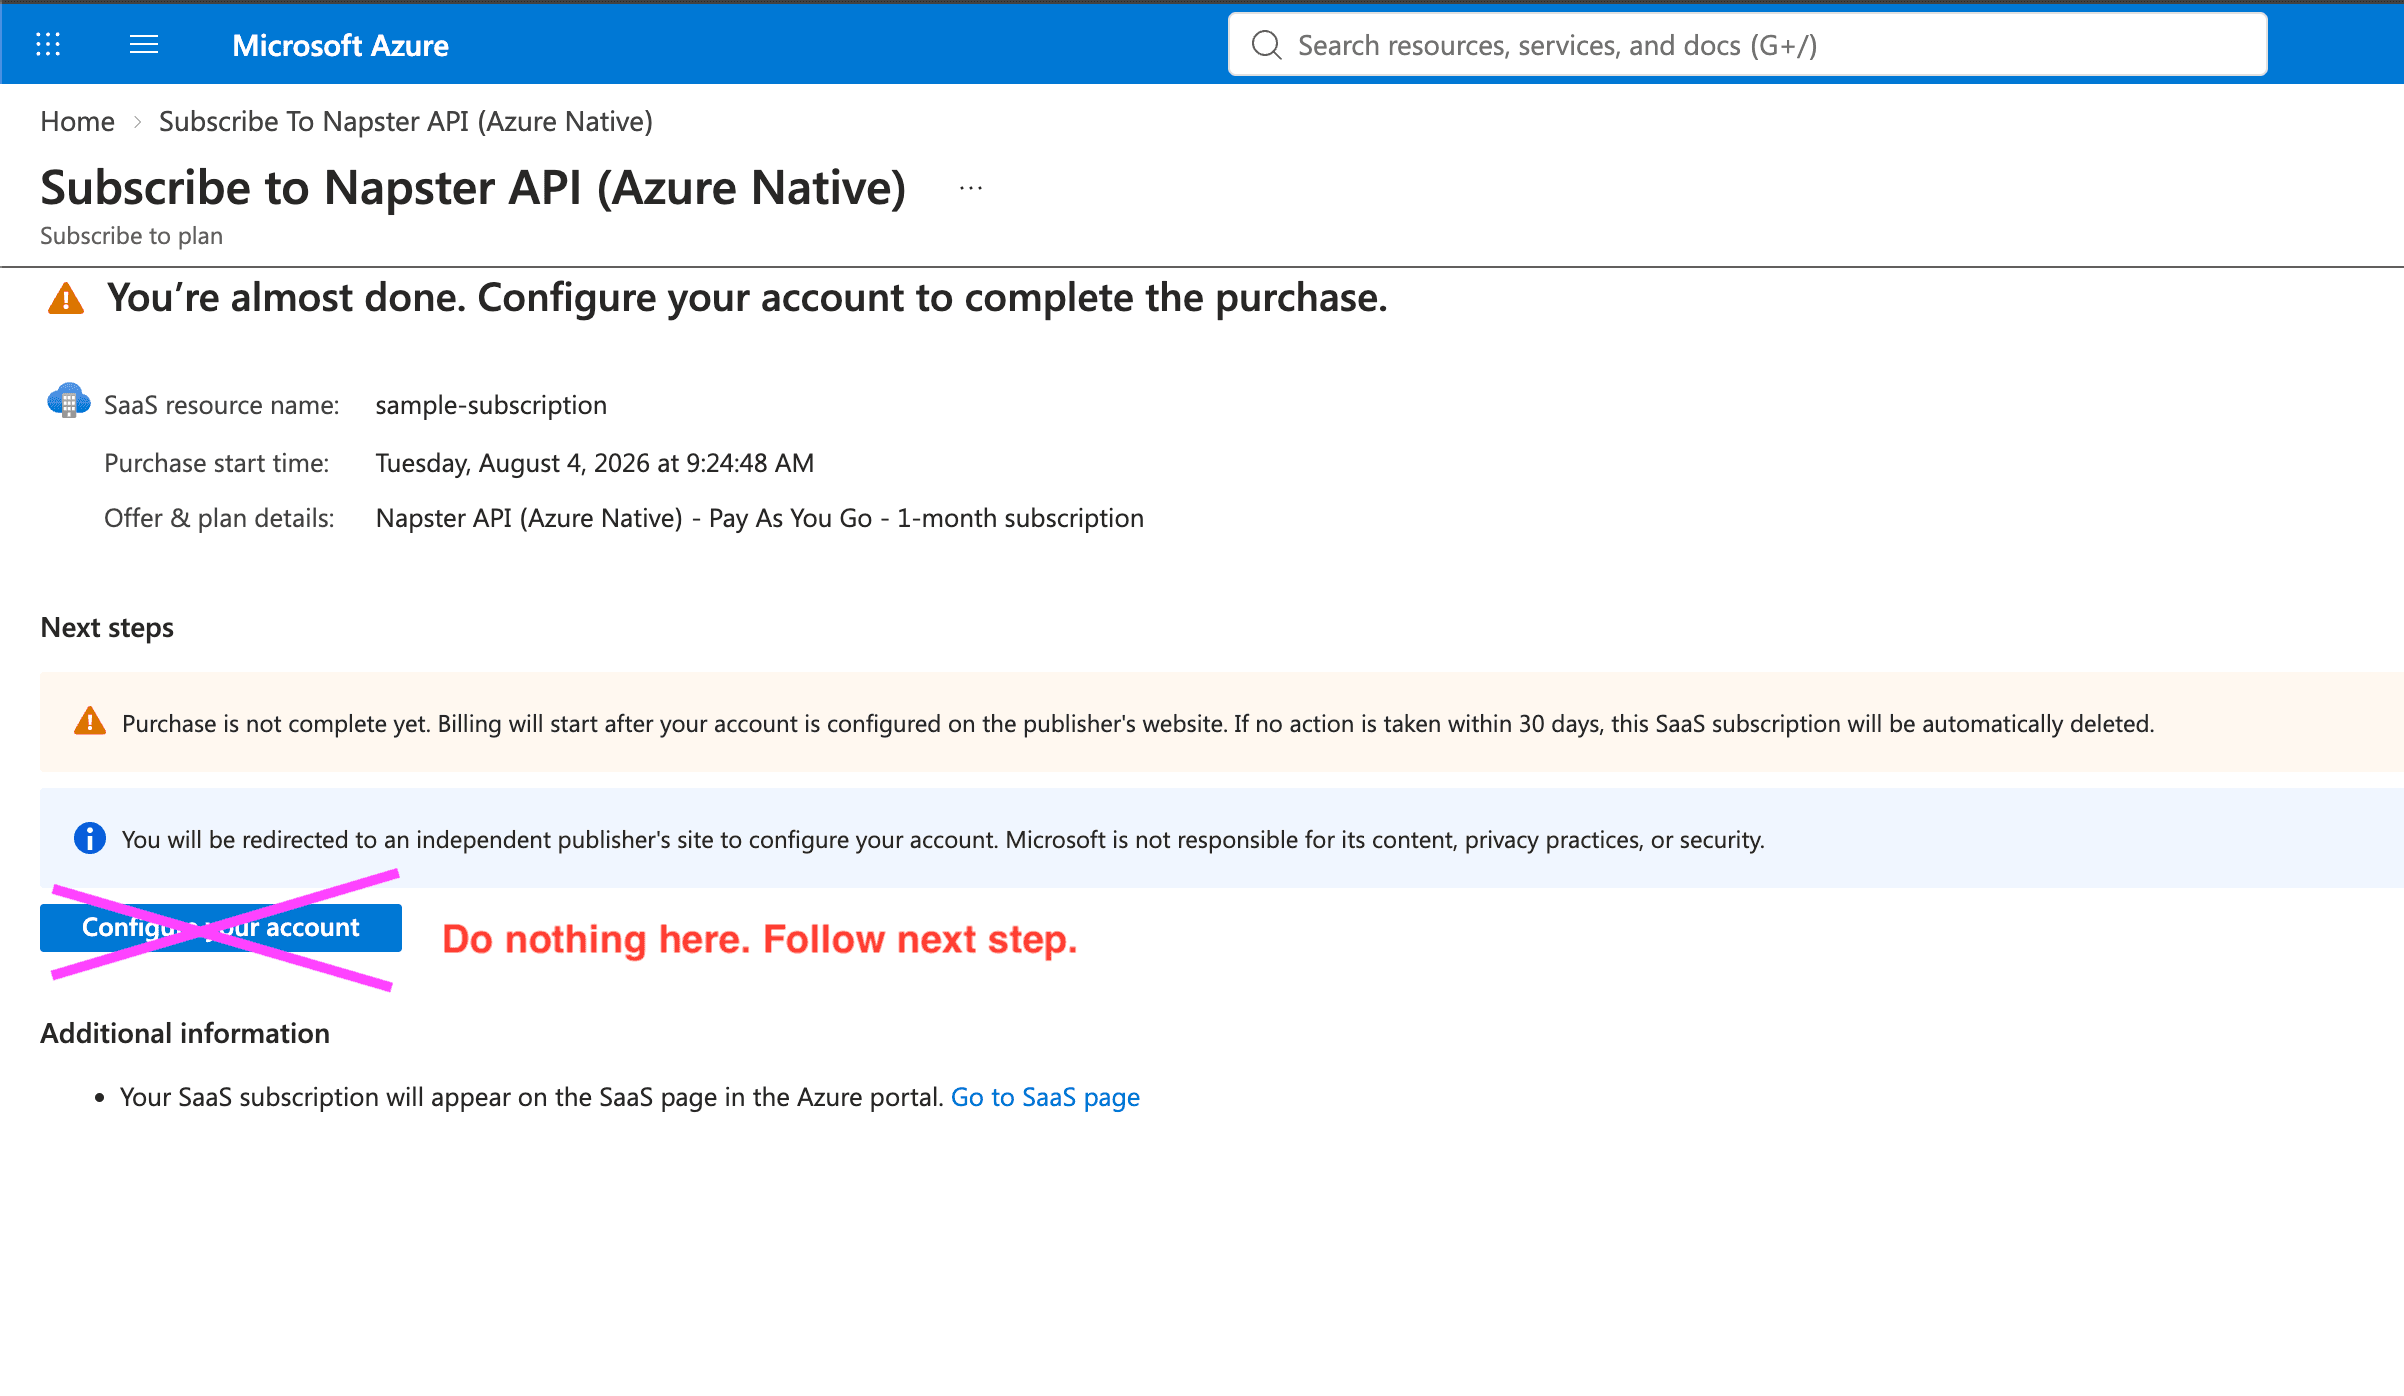
Do not configure the account
When the purchase completes, Azure shows "You're almost done. Configure your account to complete the purchase."
Do nothing here. Don't click Configure your account. You're going to link this subscription to your existing resource instead, so at the end of this step it stays deliberately not activated (its status shows as Pending fulfillment). That's correct.
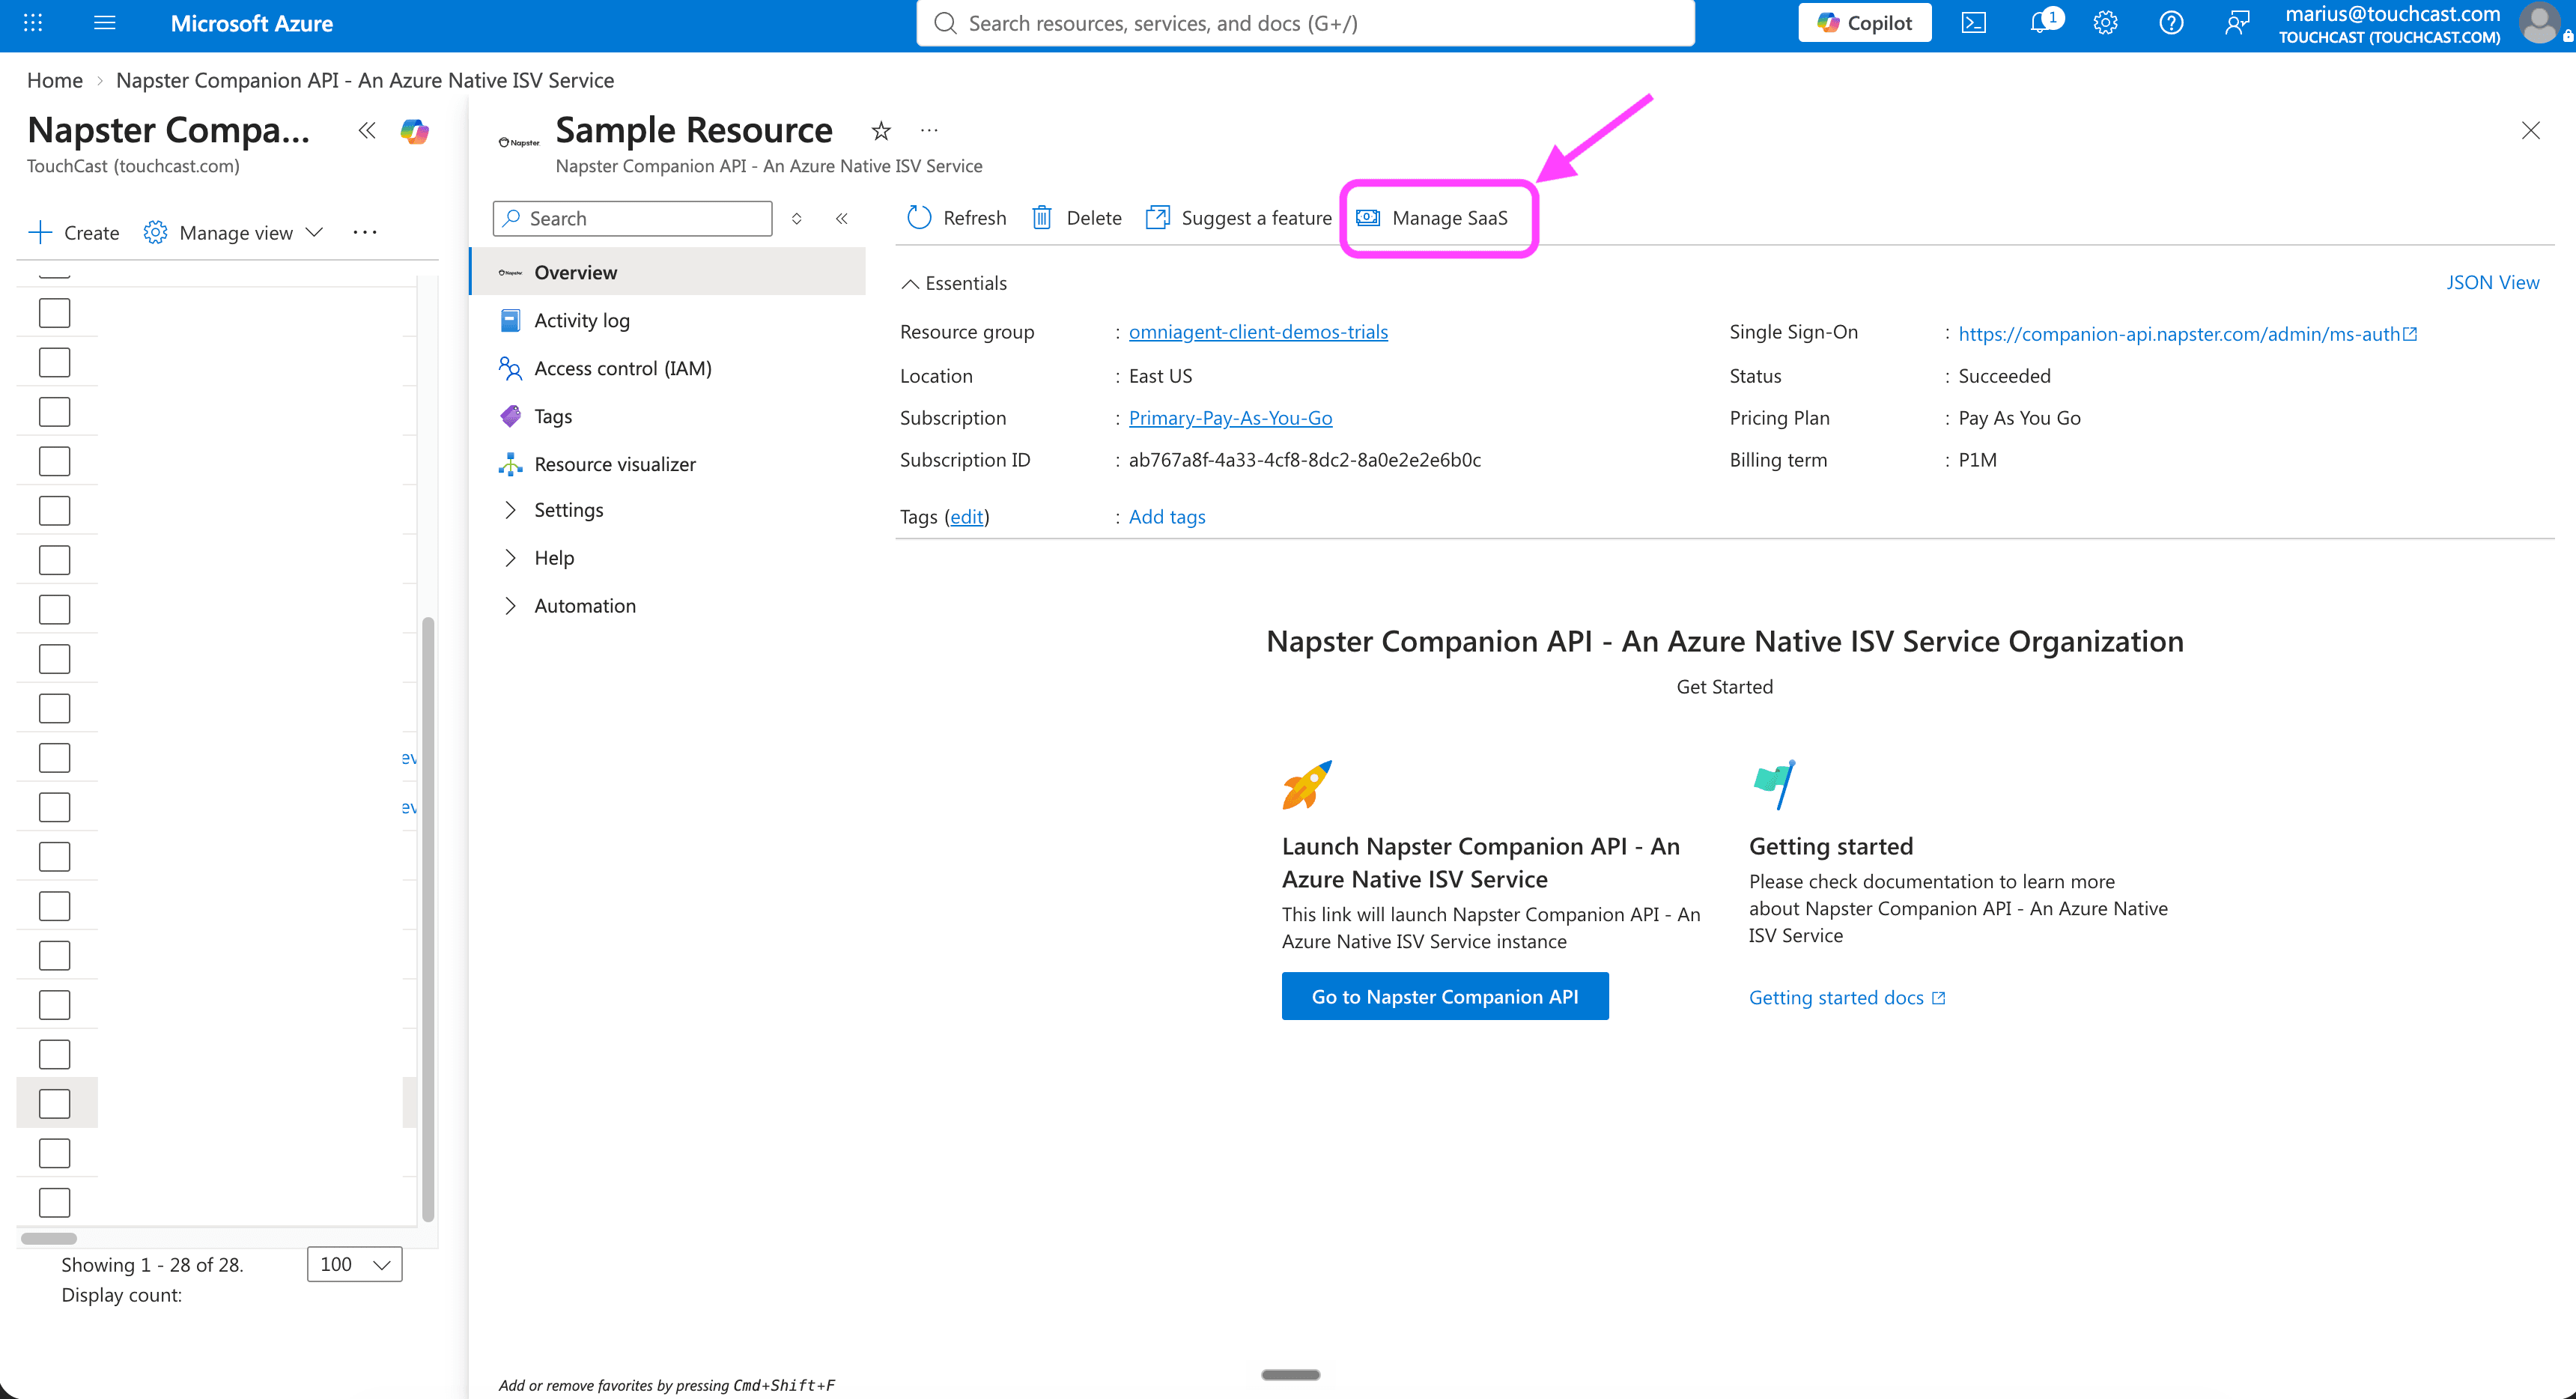
Open your existing resource and click Manage SaaS
Open the list of your Napster API resources:
https://portal.azure.com/#browse/napster.companionapi%2Forganizations
Find the resource you originally created and open it. On the resource's Overview page, click Manage SaaS in the top command bar.
Link the new SaaS subscription
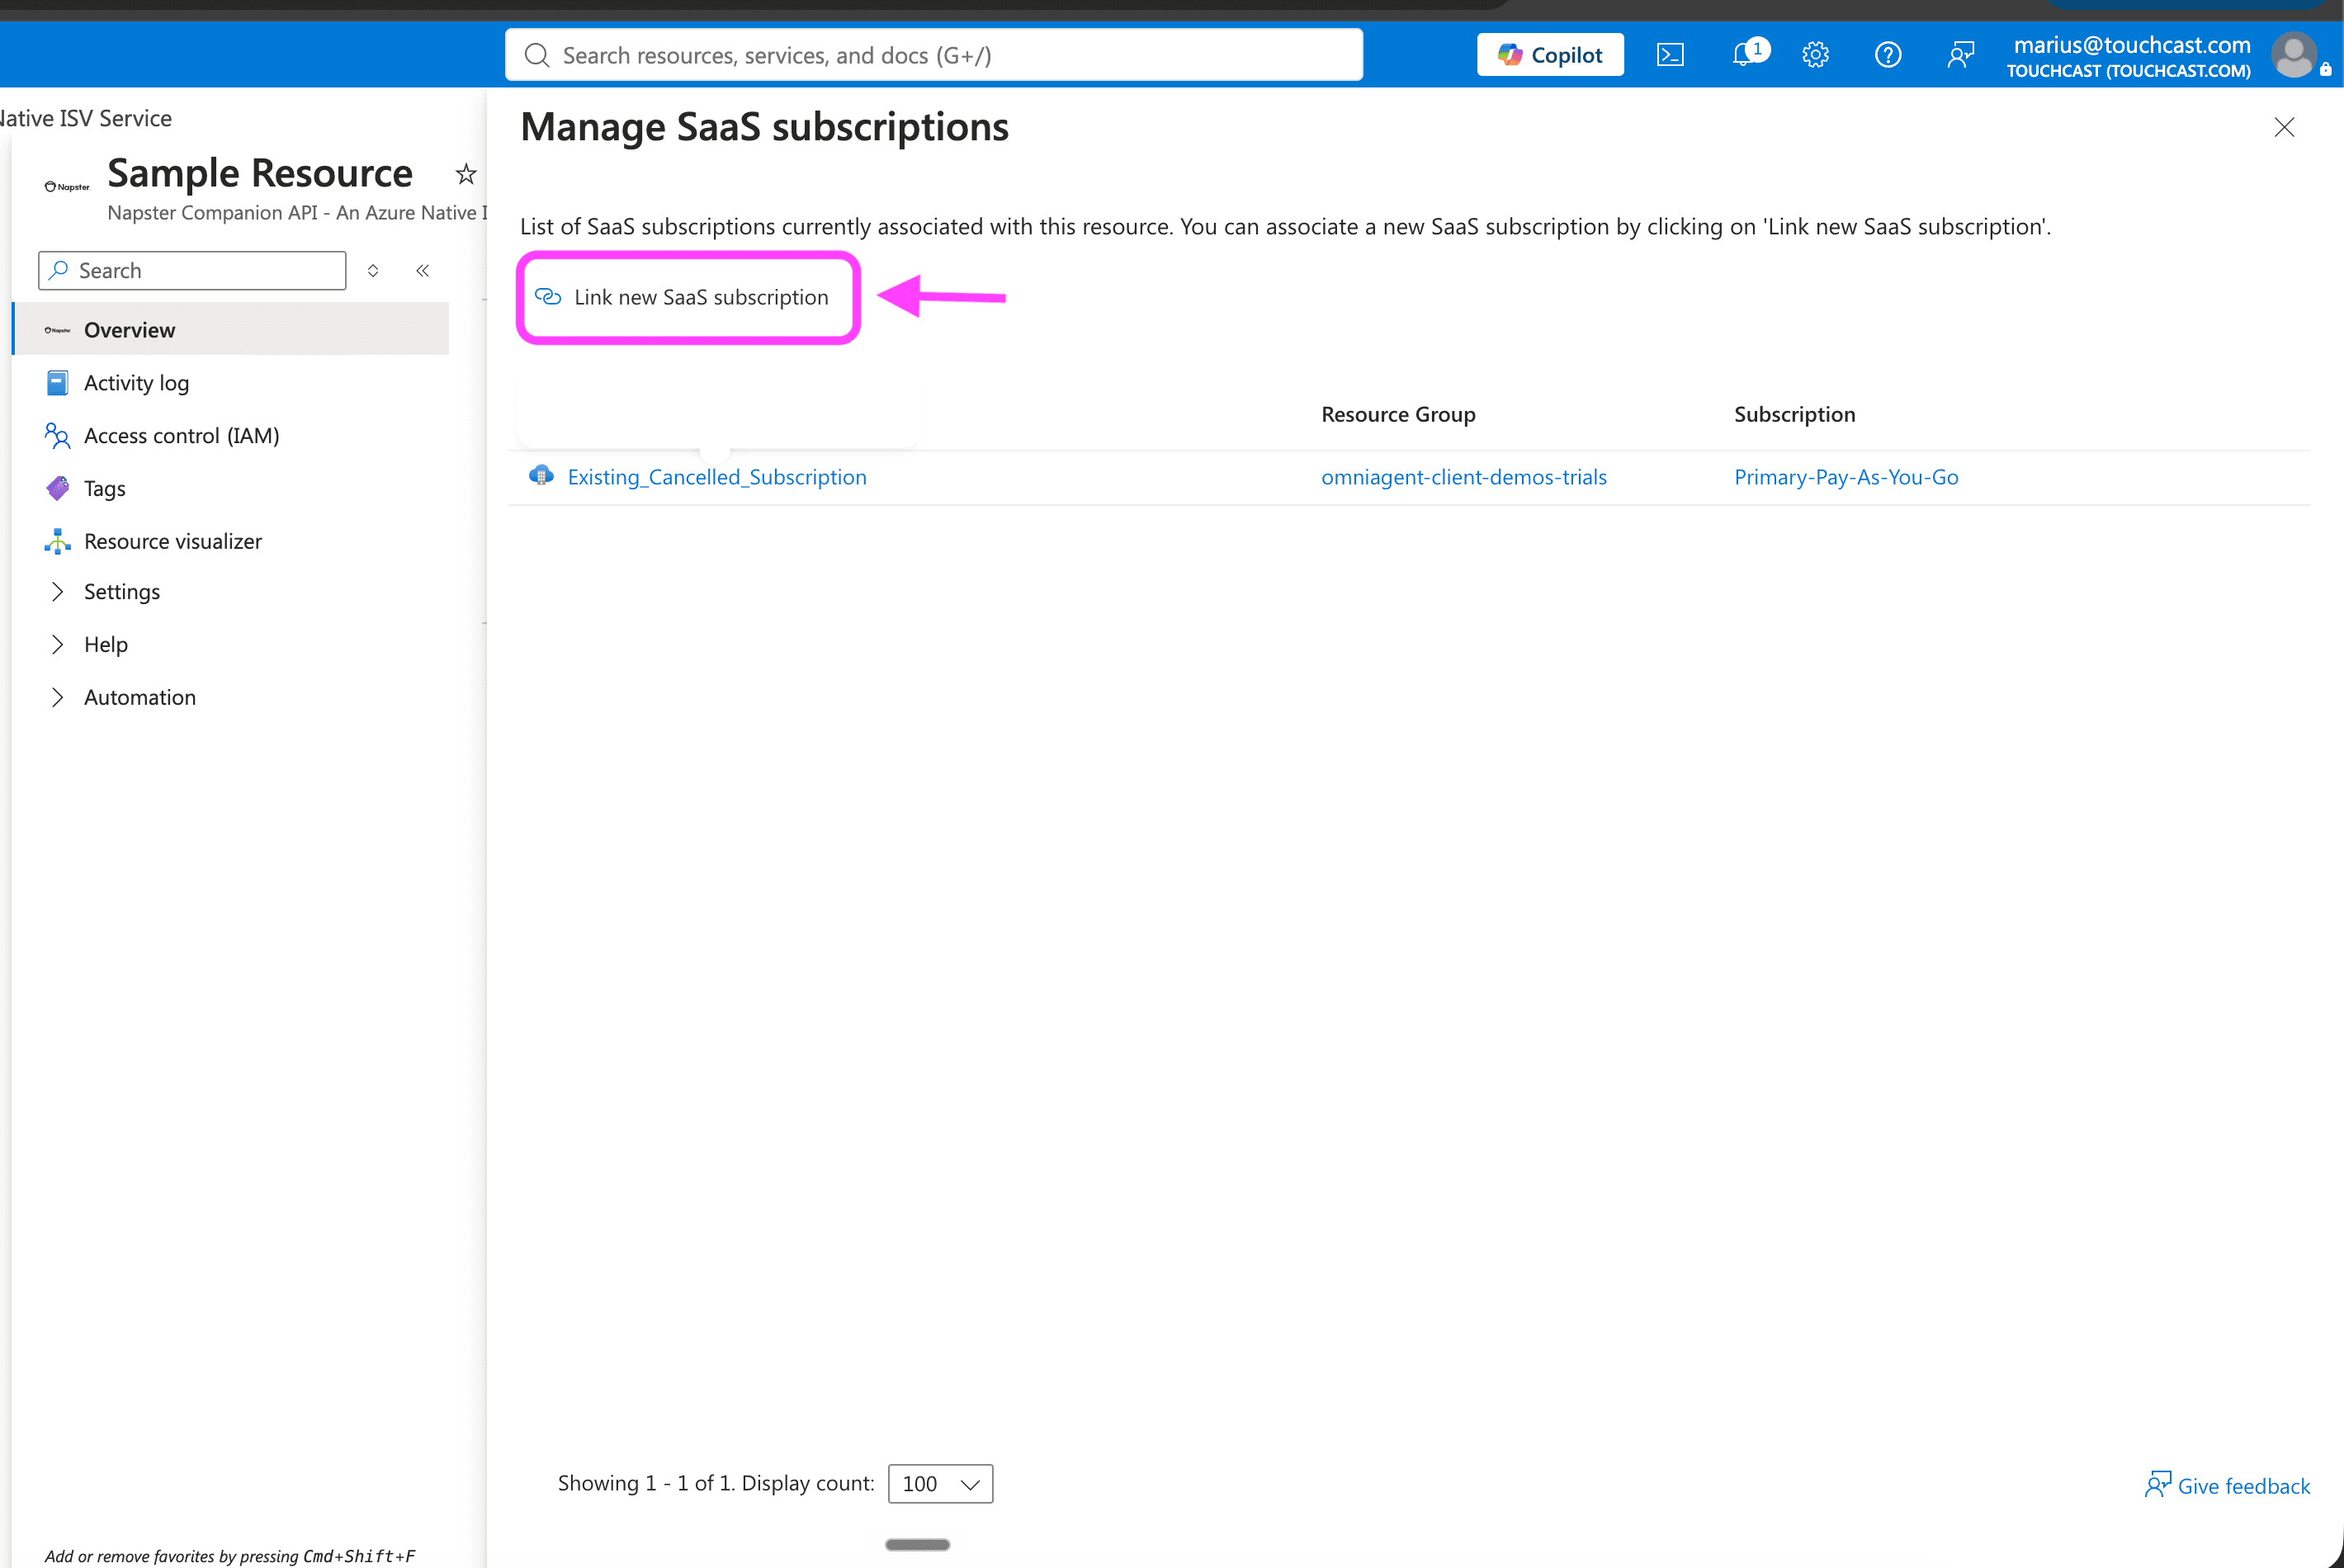
The Manage SaaS subscriptions panel lists the subscriptions associated with this resource — you'll see your old, canceled one. Click Link new SaaS subscription.
Select the new subscription and choose
Find the subscription you created in step 1 — use the filter box if you have many — select it (its status still shows Pending fulfillment), and click Choose.
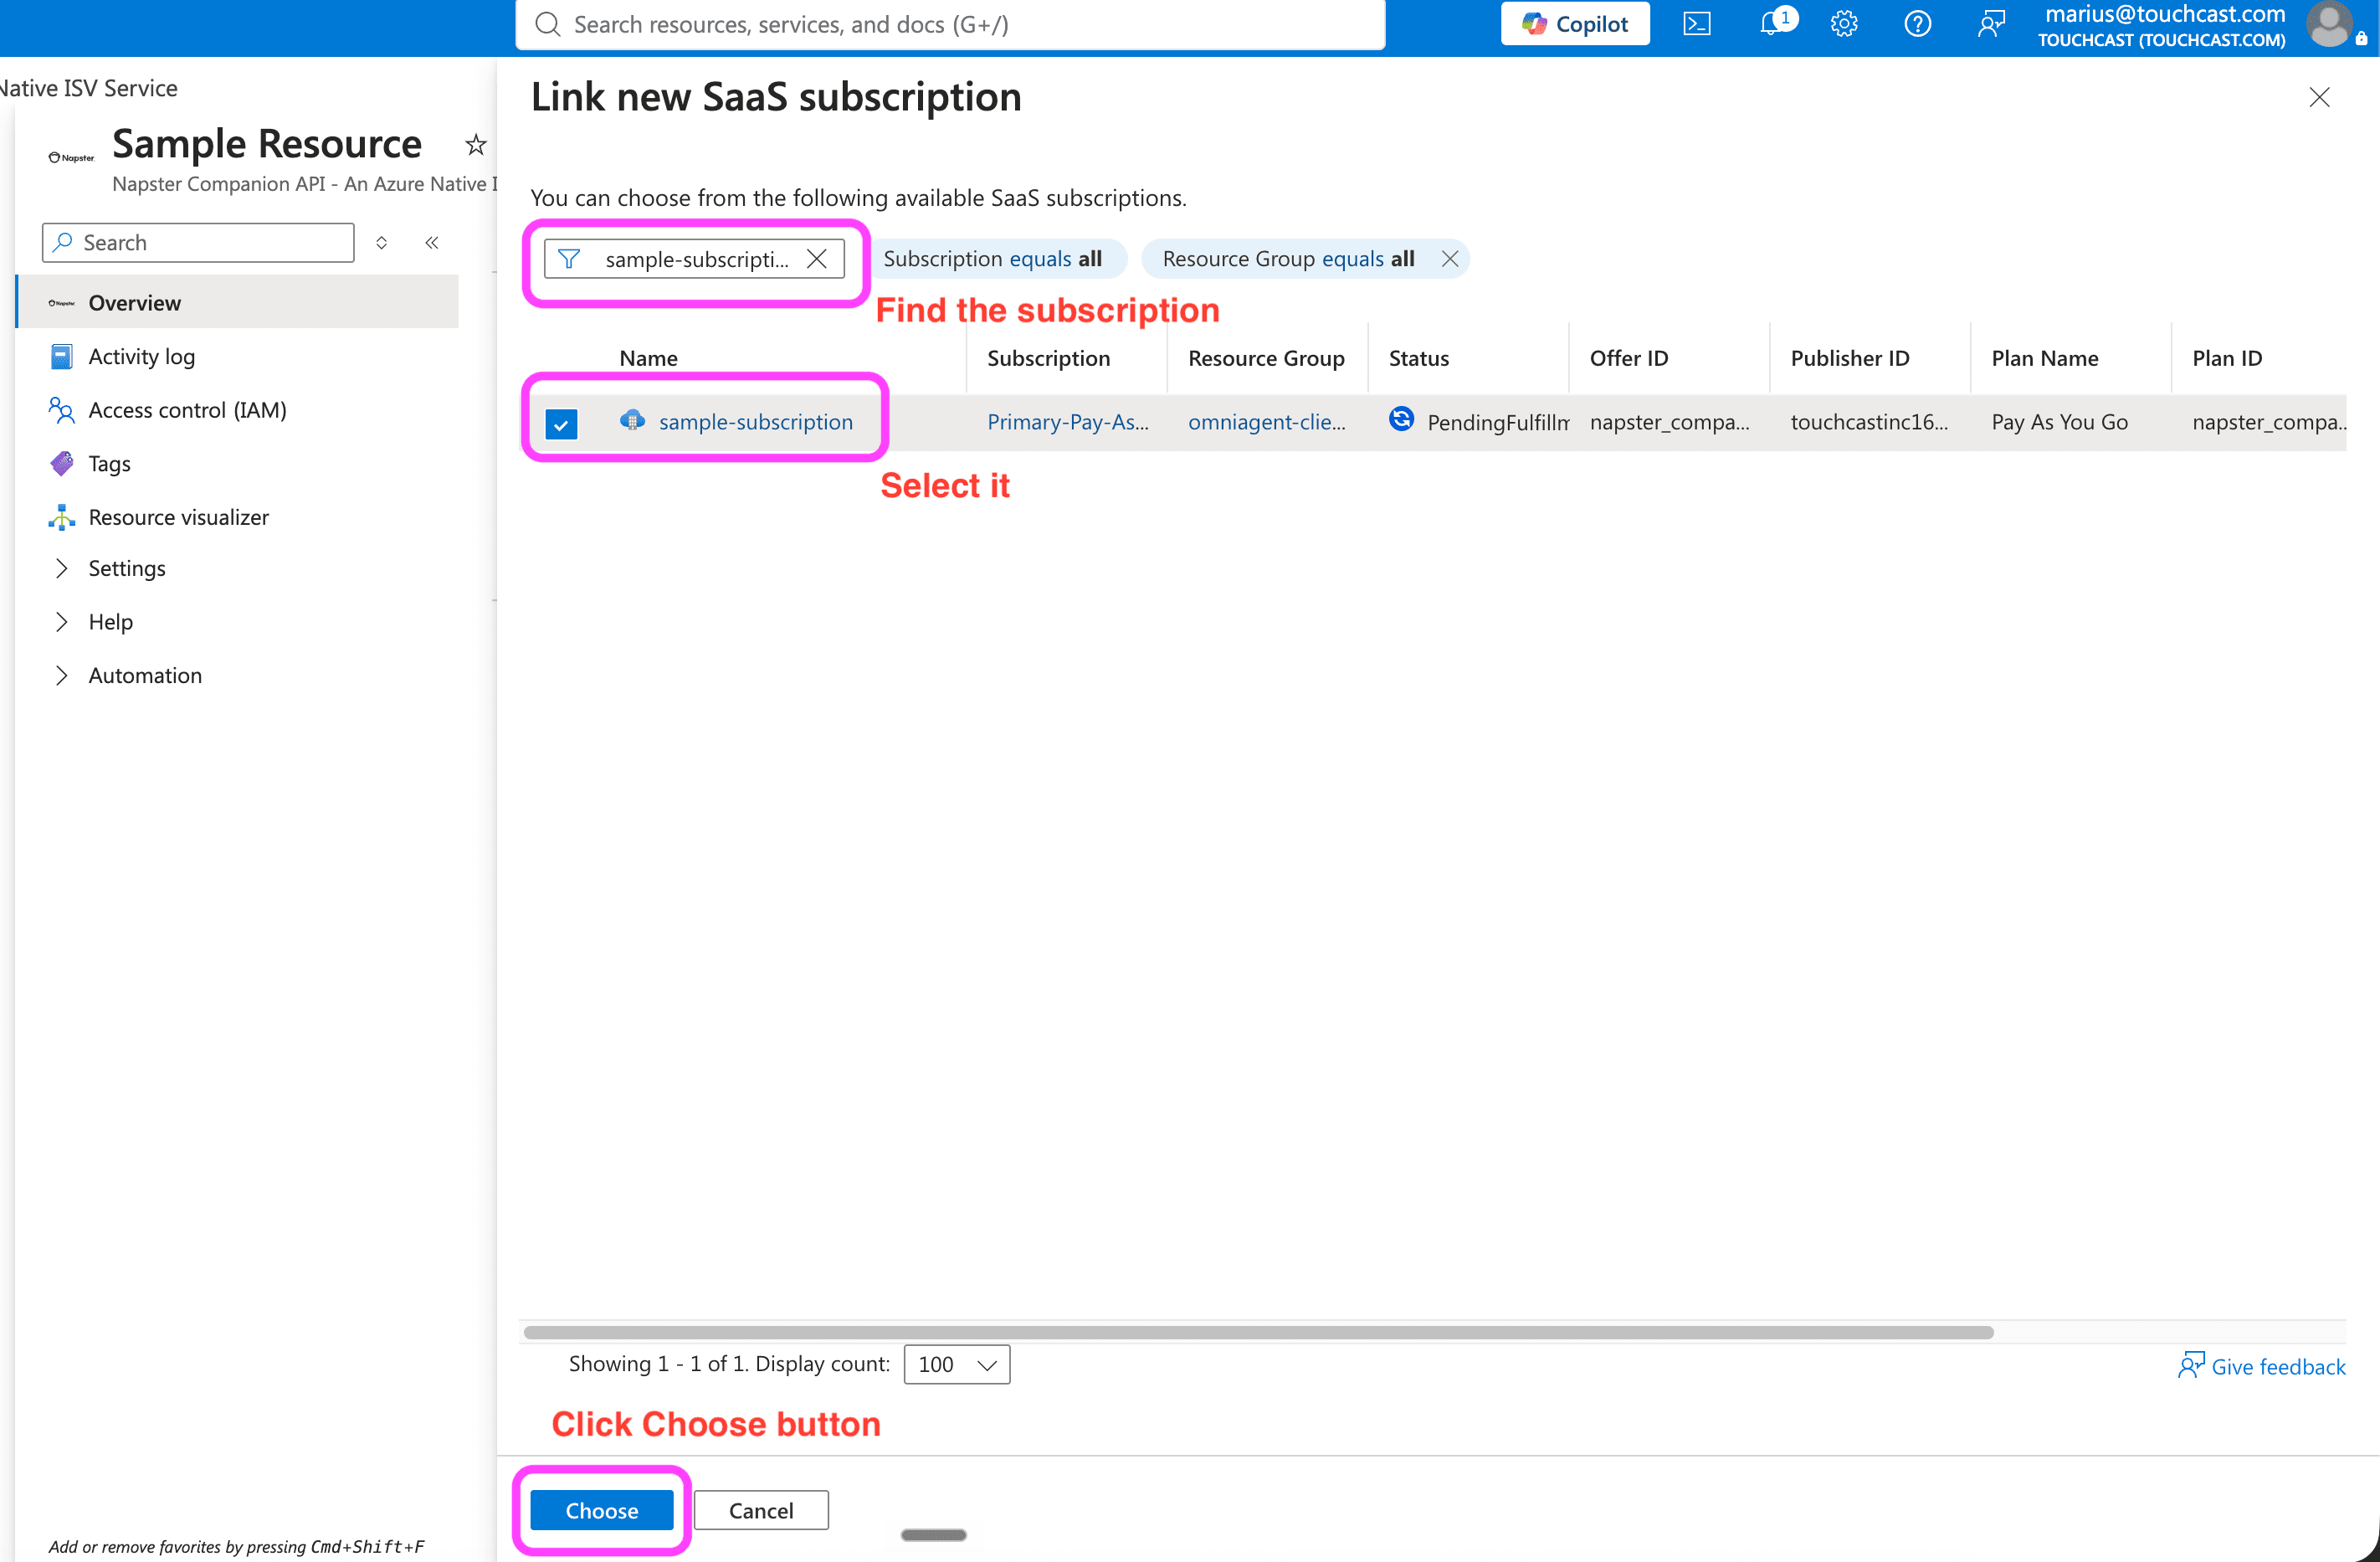
The new subscription is now linked to your existing resource. Activation completes on the Napster side, and your resource — with all its companions, agents, and keys — is back in service. Billing starts once the subscription is activated.
Because you turned auto-renew on in step 1, this subscription renews automatically — you shouldn't end up back on this page next month.